Monday, October 13, 2014

Cranberry Oat Eggnog Muffins

Good morning, my poor little neglected blog! Let's start the day off with some delicious muffins, shall we?

It's shopping day, so the fridge is pretty bare. Lately, with homeschooling my kids, I've been taking the easy way out of breakfast, with just cold cereal or maybe branching out to scrambled eggs. Not necessarily the cheapest solution, but definitely fast and easy. However, today we were out of cereal, and had only two eggs. I thought about doing oatmeal, my other recent standby, but was kind of bored with that. So I put on my not-so-lazy pants and made muffins instead.

I made these using the universal muffin formula that I've posted before. I've never had a batch fail using this formula (except once when I forgot oil, and the muffins turned out rather tough). Formula cooking isn't for everyone, some prefer specific ingredients and amounts. But I actually really like recipes that I can play with to come up with new variations. In fact, I rarely follow recipes exactly as written, so formula recipes work really well for me.

Anyway, this was a delicious muffin, full of dried cranberries and oats, with a hint of eggnog flavor. Later in the year, this combo would be great for the holidays.


Cranberry Oat Eggnog Muffins
1 cup all-purpose flour
1 cup whole-wheat flour
1/2 cup rolled oats
1/2 tsp. salt
2 1/2 tsp. baking powder
1 tsp. cinnamon
1/3 cup dried cranberries
1/2 cup sugar
1/4 cup oil
1 cup eggnog
1 egg
Additional sugar

Preheat oven to 400 degrees. Grease muffin pan.

Stir together flours, oats, salt, baking powder, cinnamon, and cranberries. In a separate bowl, whisk together sugar, oil, eggnog, and egg. Add wet ingredients all at once to dry ingredients and stir just until moistened.

Divide the batter evenly between twelve muffin cups in prepared pan. Sprinkle about 1/4 tsp. additional sugar over each muffin. Bake for 20 minutes. Remove to cooling rack immediately.

We liked these split through the middle and spread with butter. Jam would also be good, or even just eat them plain.


Wednesday, September 3, 2014

Acorn Squash Casserole

This is one of those awesomely sneaky recipes. It's called a casserole and served as a side dish, but it actually tastes like a dessert. Reminiscent of those delightful candied yams or sweet potato casseroles served alongside turkey and stuffing at Thanksgiving, this acorn squash casserole has a wonderfully sweet autumnal flavor. I found the recipe over at Cooks.com, where it was titled "Heavenly Squash Casserole." I have to agree, this stuff is heavenly.

Sorry about the picture, it was an afterthought. It wasn't until after dinner that I decided I needed to post this recipe so I could have it available whenever I wanted it. So I scooped out another serving just for the picture. Then I ate it. Of course. Can't let it go to waste. :)


Acorn Squash Casserole
(adapted from Cooks.com)
2 large acorn squash
1 cup white sugar
1 stick butter, softened
4 tsp. vanilla, divided
4 eggs, well beaten
Topping:
1 cup brown sugar
1 stick butter
2/3 cup flour
1 cup pecans, chopped (didn't have these, but they would have been an amazing addition)

Split each squash in half and scoop out seeds. Place cut side down in two large baking dishes. Unless you have one large enough for all four halves. Then by all means use that one. Add 1/4 inch water around the squashes. Bake in preheated 400 degree oven for 30-35 minutes or until tender. Scoop out squash into large bowl and beat with mixer or potato masher until smooth.

Add sugar, butter, and 2 tsp. vanilla to the squash. Mix well. In a separate bowl, beat together the remaining 2 tsp. vanilla and eggs. Add to the squash mixture and mix thoroughly. Place in a greased 2 qt. baking dish or 9x13 pan.

Combine topping ingredients and mix well. Sprinkle over top of squash mixture in pan. Bake at 350 degrees for 45 minutes. Serve warm.

This is great served on its own, but topping it with whipped cream takes it to a whole new level. Just saying.

Linking to:
Think Tank Thursday 
Link Party Palooza
Strut Your Stuff Saturday

Tuesday, August 19, 2014

Dutch Oven Apricot Chicken

I made those snickerdoodle bars again, that same evening, at a campout for a dutch oven dessert cookoff. And because of all the extra heat in the fire pit where the ovens were, and because I didn't check on the cookie bars as early as I should have, I burned the bottom to a crisp. That having been only the second time I've ever cooked with a dutch oven, I wasn't too embarrassed or devastated or anything, I just scraped the bottom off and served the bars anyway.

I thought I was over it, and okay with it. But when I decided I wanted to plan a dutch oven meal to cook and eat this week, I kind of froze. Recipes I had looked at before and wanted to try suddenly looked too complicated, too easy for me to mess up. I was scared to try again. It took some facebook encouragement from my aunt and a couple friends to get me feeling okay again. I found a very simple recipe to try and wrote it on the menu calendar for today.

Then it rained all morning, and I thought I'd have to put it off until tomorrow. Luckily, by early evening the rain had stopped and the cement in the backyard had dried enough that I was able to go ahead and light up the coals.

I'm so glad I was able to get over my nervousness and give the dutch oven another try. This apricot chicken (again, from Dutch Oven Madness) was very easy to prepare and cook, and turned out very good. For one thing, it's just beautiful. And of course, the flavor is yummy - tangy, with bits of fruit from the jam and onion from the soup mix. I would not be opposed to making this again sometime.


Dutch Oven Apricot Chicken
12" dutch oven
6 boneless skinless chicken breasts
1 cup apricot jam (I used apricot pineapple jam that my aunt made, super yummy)
1 cup catalina or french salad dressing (I used french, because the store I went to didn't have catalina in the generic brand)
2 tbsp. sugar
1 pkg. onion soup mix

Place chicken in your dutch oven. Mix remaining ingredients and pour over chicken. Bake at 350 for 1 hour. Easy peasy! I will say that my chicken didn't take the full hour to cook, it was done at about 45-50 minutes. Check for doneness before the full time has passed.

I served this over reconstituted potato shreds, the kind that comes in a food storage can. I was considering doing rice, but we've had chicken and rice a lot in the last few days, and wanted something different. Just in case anyone was wondering what that weird-looking stuff under the chicken is. :)


I used the Dinwiddie ring method for achieving the correct heat, coal counting works too if that's what you prefer. I had to add a few coals about halfway through as they got smaller. I thought that would be hard to figure out, but I just started more coals than I needed, kept the ones I didn't use right away all together so they would stay hot, and just tucked them in where needed. For longer cooking times, like several hours, I might start a new batch of coals partway through to replenish coals as they go out.

Mmm, look at that chicken swimming in all that tangy sweet sauce!


Linking to:
Think Tank Thursday
Link Party Palooza 
Strut Your Stuff Saturday

Friday, August 15, 2014

Dutch Oven Snickerdoodle Bars

We recently had our bi-annual family reunion. At these reunions, there is always a big auction, where everyone contributes items to sell and the proceeds go toward funding the next reunion. It's kind of a big deal in our family. I posted about this a few years ago here.

Anyway, Jeff and I had a lot of fun at this year's auction, and got all sorts of neat stuff. Our biggest purchase was a dutch oven. It's a 12-inch, 8-quart dutch oven that has obviously been properly cared for and beautifully seasoned. The thing is, I've never cooked anything in a dutch oven. So I've been reading everything online that I can find about how to cook with and care for dutch ovens, and I was finally ready today to give it a try!


This recipe came from a great blog for anyone interested in using a dutch oven. Toni decided that she wanted to try something new, so she committed to cooking in her dutch oven(s) every day for an entire year! Wow! Her first month or two of recipes include helpful tips of things that she was learning along the way, and she has a few other resources scattered throughout that were helpful and encouraging. Plus she graded almost every recipe so you know what was really good and what wasn't good at all. Most of the recipes rated either a B or an A. These cookie bars received an A.


Dutch Oven Snickerdoodle Bars
(from Dutch Oven Madness)
12" dutch oven
2 1/3 cup flour
1 1/4 tsp. baking powder
1/2 tsp. salt
3/4 cup butter, softened
1 1/4 cup sugar
1/2 cup brown sugar
3 eggs
1 tsp. vanilla
Cinnamon Filling:
1 tbsp. sugar
1 tbsp. cinnamon
Glaze:
1/2 cup powdered sugar
1/4 tsp. vanilla
1/2 tbsp. milk

In a small bowl combine the flour, baking powder, and salt. In a large bowl beat the butter until creamy. Beat in the sugars until fully incorporated. Then beat in the eggs, one at a time, until fully incorporated. Add vanilla. Slowly mix in the dry ingredients.

Spread half of the batter on the bottom of a greased 12" dutch oven. Mix together the cinnamon filling ingredients and sprinkle evenly over the batter in the pan. Dollop the remaining batter in teaspoonfuls over the cinnamon filling. Don't worry about it not completely covering the filling - everything will spread out in the oven and have a great marbled look.

Bake at 350 for 20-25 minutes or until a toothpick inserted in the middle comes out clean. Let cool completely, then mix together the glaze ingredients (adding more milk if it's too thick, or more sugar if it's too thin) and drizzle over the top of the bars.

There are different ways to get the dutch oven to the temperature you want. One popular method is coal counting - for a 12" oven to cook at 350 you would want 16 coals on top and 10 on the bottom. But this doesn't take into account the size of the coals - some are bigger than others. Toni at Dutch Oven Madness prefers the Dinwiddie Ring method, because it allows you to accurately cook with any size coals and makes it so you don't have to count. I chose to use this method and it was easy to figure out, and the bars baked up beautifully.

Dinnwiddie ring method - one ring of coals on the bottom, one and a half rings on top to achieve approximately 350 degrees.


Actually, my cookie bars were slightly undercooked, but that's because I jumped the gun and didn't actually test them for doneness with a toothpick. They could have used a few more minutes, but even underdone, they tasted incredible, and I'm so excited to try more recipes! I don't think I'll be cooking in the dutch oven every single day, but I can say for certain that my new toy will not be put away in a closet only to be brought out for camping. It's too easy and too fun to only be used once or twice a year!


Linking to:
Link Party Palooza
Strut Your Stuff Saturday
Think Tank Thursday

Monday, July 28, 2014

Chocolate Berry Truffle Cheesecake


When I was a teenager, my dad decided he wanted to learn how to make gourmet cheesecakes. He bought a recipe book featuring a large variety of cheesecakes, and started baking. These cheesecakes were a big departure from the no-bake Jell-O cheesecakes of my childhood. There was a year or two when we were almost constantly trying new fancy cheesecake recipes, everything from Chocolate Turtle Cheesecake to No-Bake Peanut Butter Cheesecake to Banana Split Cheesecake. Mmm. Those were good times.

The very first cheesecake that Dad made out of that beautiful little book was called Chocolate Raspberry Truffle Cheesecake. It was a 10-inch cheesecake that used 2 full pounds of cream cheese, a lot of chocolate chips, and seedless raspberry preserves. He took the sides off the springform pan too soon, so it ended up being a giant shapeless blob in the refrigerator. But it was the richest, most decadently delicious shapeless blog any of us had ever experienced. It was amazing.


After that first cheesecake, Dad's skills improved and we had no more shapeless blobs occupying the place of honor on the fridge shelf. With each cheesecake, he (and those of us kids who watched or helped) learned about ways to keep the cheesecake from cracking, how to mix it properly to reduce lumps, how to bake it and cool it just right. For instance, scrape the sides of the bowl very frequently while mixing, especially after adding a new ingredient. The cheesecake is done baking when the middle half is still relatively jiggly - if it doesn't still jiggle it's overdone. Make sure to let the cheesecake cool completely (and slowly) before removing the springform pan sides. If your cheesecake cracks it's perfectly acceptable to top it with whipped cream or sweetened sour cream to hide the cracks! But still, no matter how many successful and beautiful masterpieces Dad turned out, that first sloppy pile of cheesecake-y goodness has always been my favorite.

The recipe calls for seedless raspberry preserves. But I can't always find those, I don't know why. So I'll sometimes use a different type of berry preserves, with great results. This time I used seedless blackberry preserves. I'll compromise on the type of berry the preserves are made of, but I won't compromise on the fact that they have to be seedless. To get the smooth, perfect texture in the chocolate truffles, you need to use preserves that don't have seeds or chunks.


Chocolate Berry Truffle Cheesecake
Crust:
1 1/2 cups finely crushed cream-filled chocolate sandwich cookie crumbs
2 tablespoons margarine, melted
Filling:
1 1/2 pounds cream cheese, softened
1 1/4 cups sugar
3 eggs
1 cup sour cream
1 teaspoon vanilla
Truffles:
8 ounces cream cheese, softened
9 ounces semi-sweet chocolate, melted
1/2 cup seedless raspberry preserves
Topping:
6 ounces semi-sweet chocolate
1/3 cup heavy cream

1. To make crust, combine cookie crumbs and margarine and press into the bottom of a 10-inch springform pan. Set aside.
2. Preheat oven to 325 degrees.
3. To make filling, with an electric mixer set on medium speed combine 1 1/2 pounds cream cheese and sugar until well blended (scrape sides of bowl frequently throughout steps 3-7 to prevent lumps).
4. Add eggs, one at a time, mixing well after each addition.
5. Blend in sour cream and vanilla and then pour into prepared crust. Set aside.
6. Combine 8 ounces cream cheese and melted chocolate, mixing at medium speed until well blended.
7. Add raspberry preserves, mixing together well.
8. Drop chocolate raspberry batter by tablespoonfuls onto plain cream cheese batter in pan (I used my 2-tbsp. cookie scoop). Do not swirl.
9. Bake for 1 hour and 25 minutes.
10. Remove from oven, loosen cake from sides of pan, and let cool on a wire rack for 1 to 2 hours before removing from pan (I actually leave it in the pan until ready to serve).
11. To make topping, cook chocolate and heavy cream over low heat, stirring constantly, until chocolate has melted and mixture is smooth.
12. Remove from heat and spread over cooled cheesecake.
13. Chill for 4 to 6 hours.

After dolloping on the chocolate truffle mixture and placing in the oven.

Immediately after removing from the oven. The cheesecake sinks quite a bit while cooling, that's normal. I baked the cheesecake last night, forgive my use of the camera flash!

After cooling, the cheesecake is at least half an inch shorter than it was before.

Freshly covered in chocolate ganache.


Rich, dense, chocolaty. The most intense cheesecake experience ever.

Linking:
Think Tank Thursday
One Project at a Time
Link Party Palooza
Strut Your Stuff Saturday

Friday, July 25, 2014

Biscuits and Gravy Casserole, and Milky Maple Soda

Everyone knows it's fun to have breakfast for dinner. It's one of my personal favorites, because it's usually easy and cheap, and I just love breakfast foods. Biscuits and gravy especially seem to be delicious and appropriate any time of the day.

This recipe takes those simple biscuits and gravy just a step further - a little fancier and a little funner. But without adding a lot of extra work. This recipe originally called for canned biscuits, which I'm sure are absolutely delicious when used in this dish. I took it a little step toward tightwaddery and used homemade biscuit dough.


These biscuits and gravy turned out so yummy. The bottom layer of biscuits soak up the gravy and take on almost a dumpling texture, while the biscuits on top are browned and fluffy like typical biscuits. The gravy is just a basic sausage gravy that complements both layers of biscuits perfectly.


Biscuits and Gravy Casserole
(adapted from lemon-sugar)
2 cups flour
1 tbsp. baking powder
1 tsp. salt
2/3 cup shortening
3/4 cup milk
1/2 lb. ground sausage
3 tbsp. flour
2 1/2 cups milk
1/2 tsp. salt
1/2 tsp. black pepper

Preheat oven to 400 degrees. Prepare a small casserole dish (7x11) with cooking spray. Set aside.

Combine 2 cups flour, baking powder, and 1 tsp. salt. Cut in shortening. Stir in milk just until combined. Turn out onto floured surface and knead gently 2-3 times. Flatten with hand or rolling pin until 1/2 inch thick. Using a pizza cutter, cut into 1 1/2- or 2-inch squares.

Layer half of the biscuit squares in prepared pan. Bake for 10 minutes.

Meanwhile, prepare gravy: In a heavy skillet, cook ground sausage over medium heat until fully cooked. Sprinkle the sausage with 3 tbsp. flour. Stir flour into sausage until completely absorbed. Lower heat to medium, and cook flour/sausage mixture 3-5 minutes, stirring frequently.

Add milk, salt, and pepper; stir to combine. Stir frequently until mixture comes to a slight boil. Taste, and adjust seasonings as desired.

Pour gravy over cooked biscuits. Layer remaining uncooked biscuit squares over the gravy.

Place casserole on a baking dish, and bake for 25 minutes or until golden brown.


This soda recipe came from a book we got at the library. It's called Grandpa's Cloudy With a Chance of Meatballs Cookbook, based on the original story. It's got recipes for things like Spaghetti Twister with a Tomato Tornado, Foggy Pea Soup, Chewandswallow Chicken Legs, and Jello-O Setting in the West.


Jeff decided to mix up some Milky Maple Soda to go with dinner tonight, "just like they serve in Ralph's Roofless Restaurant."


Milky Maple Soda
Milk
Plain seltzer
1 tbsp. maple syrup

Fill 1/4 of a glass with milk. Fill the rest of the glass with seltzer, leaving a little room at the top. Add about a tablespoon of maple syrup (more or less, to your taste). Stir and slurp!

I think I added about an extra tablespoon of syrup to my glass, I like things to be sweet! Anyway, this was a fun and unique little treat.

Linking:
Link Party Palooza
Strut Your Stuff Saturday

Monday, July 7, 2014

Creamed Chicken

I have spent a great portion of the day reading through my blog, sort of a trip down memory lane. It's been fun to reminisce, and to see how my blog has progressed and gone through its many phases and stages. For a while, I was posting so frequently that I felt guilty if I went a whole week without posting. Wow, that is not how I do it lately! Anymore, I only post once or twice a month, if that. I really want to get back into the habit of posting more frequently. So here I am, posting our simple, inexpensive, yet delicious meal that we enjoyed tonight.

I enjoy using chicken leg quarters. They're one of the cheapest sources of meat, at under a dollar a pound. We use them as is, or separated to have the thighs for one meal and the drumsticks for another. My favorite way to use them in recipes is to start by stewing them in water until they are tender. Just cover with water, bring to a boil, reduce heat to medium or medium-high, and simmer until completely done. The longer they cook, the more tender they get. Remove the chicken from the broth, reserving the broth of course. Once the chicken has cooled down, you can pull all the chicken from the bones and use the chicken in whatever recipe you want.

I recently learned a great tip for taking chicken dishes from good to amazing. Adding thyme and a small amount of turmeric gives an incredible flavor, as well as a pretty color, to everything from chicken soup to chicken pie. Tonight I used this seasoning trick in our creamed chicken, with great results. We served the chicken over pasta, but it was so good I was eating the chicken gravy by itself by the end of the meal!


Creamed Chicken
2 chicken thighs, boiled in water until tender, then removed from bones and shredded (see above)
Broth from boiling the chicken
1 cup frozen peas, run under hot water until thawed
1 cup frozen sliced carrots, microwaved with a little water until thawed and softened
1/4 cup margarine or butter
1/4 cup flour
1 or 2 dashes turmeric
1/2 tsp. dried thyme
8 oz. macaroni noodles, cooked and drained

Melt margarine in large saucepan. Add flour and whisk until smooth. Slowly whisk in 2 1/2 cups chicken broth. Cook and stir over medium heat until smooth and thickened. Stir in turmeric, thyme, and salt and pepper to taste. Add peas, carrots, and chicken. Serve over noodles. This would also be good over rice, mashed potatoes, or like I said, all by itself!


Linking to tatertots & jello

Tuesday, July 1, 2014

My Kitchen My World - Israel

It seems that all I'm posting lately is my monthly submission for My Kitchen My World. I need to get on the ball and post other things! Especially since MKMW is going to be taking a break for a while. Participation has not been very high for the past several months. My family and I have really been enjoying the opportunity/excuse to make something fun from a different country each month, we've tried a lot of things we otherwise wouldn't have.

Israel was originally assigned for April, but due to lack of participation it was moved to June to give everyone a chance to try again. The funny thing is, I actually made this meal back in April, but never got around to blogging it. Now here it is all the way into July, and I'm finally putting these delicious recipes up onto the blog. I might be a little bit of a procrastinator...


I chose to make falafel, a popular Israeli street food. We served it with pita bread, yogurt sauce, and fresh tomatoes, cucumber, and lettuce. Super yummy! The whole family liked the little fried balls of seasoned chickpeas, the pita bread was soft and delicious, the yogurt sauce brought it all together. All in all a great meal.


Falafel
(from This American Bite)
2 1/2 cups cooked chickpeas
1 onion, chopped
1/2 cup parsley (used 2 tbsp. dried parsley)
6 cloves garlic (used equivalent in bottled minced garlic)
4 tsp. cumin
2 tsp. coriander
2 tsp. za'atar (substituted thyme)
1 tsp. black pepper
1 tsp. salt
Juice of 1 lemon
1/4 cup whole wheat flour
1 egg

With the exception of the flour and egg, put all of the ingredients into the food processor. Rather than running the food processor continuously,  pulse the ingredients three or four times until the ingredients are minced, but not pureed.

Transfer the falafel mixture into a non-metallic bowl and add 1/4 cup of flour and one egg to bind the mixture.  Mix the flour and egg well so you don’t get any flour pockets.

Using a teaspoon, scoop 1.5 tsp of the falafel mix into your hands then use the spoon to mold them into a ball shape.  Press the mixture so that it is firm – this will prevent them from disintegrating when you fry them.

Using any pot or dutch oven, fill it with a neutral oil, like canola, vegetable or grapeseed oil and use a chef basket. If you have a candy thermometer, wait until the oil reaches 350 degrees before frying putting the falafel balls into the hot oil to fry. If you do not have a candy thermometer, you can put one of your falafel balls into the oil, if it’s not hot enough it won’t cook and it may start to disintegrate.

When you are sure the oil is hot enough, gently place the falafel balls into the hot oil. Don’t crowd the falafel, let them swim in the oil for two minutes, until golden brown. If the top of the falafel float above the oil, turn them with a spoon then fry for another minute. The falafel will cook quickly at this size, so be ready with a plate covered with a sheet of paper kitchen towel to soak up excess oil once cooked.

Best served fresh from the oil, but you can reheat them in a warm oven (no hotter than 250 degrees).


Pita Bread
(from Annie's Eats)
3 cups flour, plus 1/2-3/4 cup more as needed
1 ½ tsp. salt
1 tbsp. sugar or honey
1 packet instant yeast
1 ¼ to 1 ½ cups water, roughly at room temperature
2 tbsp. olive oil, vegetable oil, butter or shortening

Mix the yeast in with the flour, salt, and sugar. Add the olive oil and 1 ¼ cup water and stir together with a wooden spoon. All of the ingredients should form a ball. If some of the flour will not stick to the ball, add more water.

Once all of the ingredients form a ball, place the ball on a work surface, and knead the dough for approximately 10 minutes. If you are using an electric mixer, mix it at low speed for 10 minutes. As the dough is mixing, continue to add flour, a tablespoon or two at a time, until the dough clears the sides of the bowl and is tacky but not sticky.

When you are done kneading the dough, place it in a bowl that has been lightly coated with oil. Form a ball out of the dough and place it into the bowl, rolling the dough around so that it has a light coat of oil on all sides. Cover the bowl with plastic wrap or a damp towel and set aside to rise until it has doubled in size, approximately 90 minutes.

When it has doubled in size, punch the dough down to release some of the trapped gases and divide it into 8 equal pieces. Roll each piece into a ball, cover the balls with a damp kitchen towel, and let them rest for 20 minutes. This step allows the dough to relax so that it will be easier to shape.

After the dough has relaxed for 20 minutes, spread a light coating of flour on a work surface and place one of the balls of dough there. Sprinkle a little bit of flour on top of the dough and use a rolling pin or your hands to stretch and flatten the dough. You should be able to roll it out to between ¼ – 1/8” thick – 6 inches in diameter. If the dough does not stretch sufficiently, you can cover it with the damp towel and let it rest 5-10 minutes before trying again.
Place discs on a lightly greased baking sheet or parchment paper and let rise, uncovered, until barely doubled in thickness, about 30-45 minutes.

While the discs are rising, preheat the oven to 450°. If you have a baking stone, put it in the oven to preheat as well. If you do not have a baking stone, turn a cookie sheet upside down and place it on the middle rack of the oven while it is preheating. This will be the surface on which you bake your pitas.

Open the oven and place as many pitas as you can fit on the hot baking surface. They should be baked through and puffy after 3 minutes. You may need to let the baking surface reheat for a minute or two between batches - if the surface isn't hot enough a pocket will not form. If you want your pitas to be crispy and brown you can bake them for an additional 3 to 5 minutes, but it isn’t necessary.


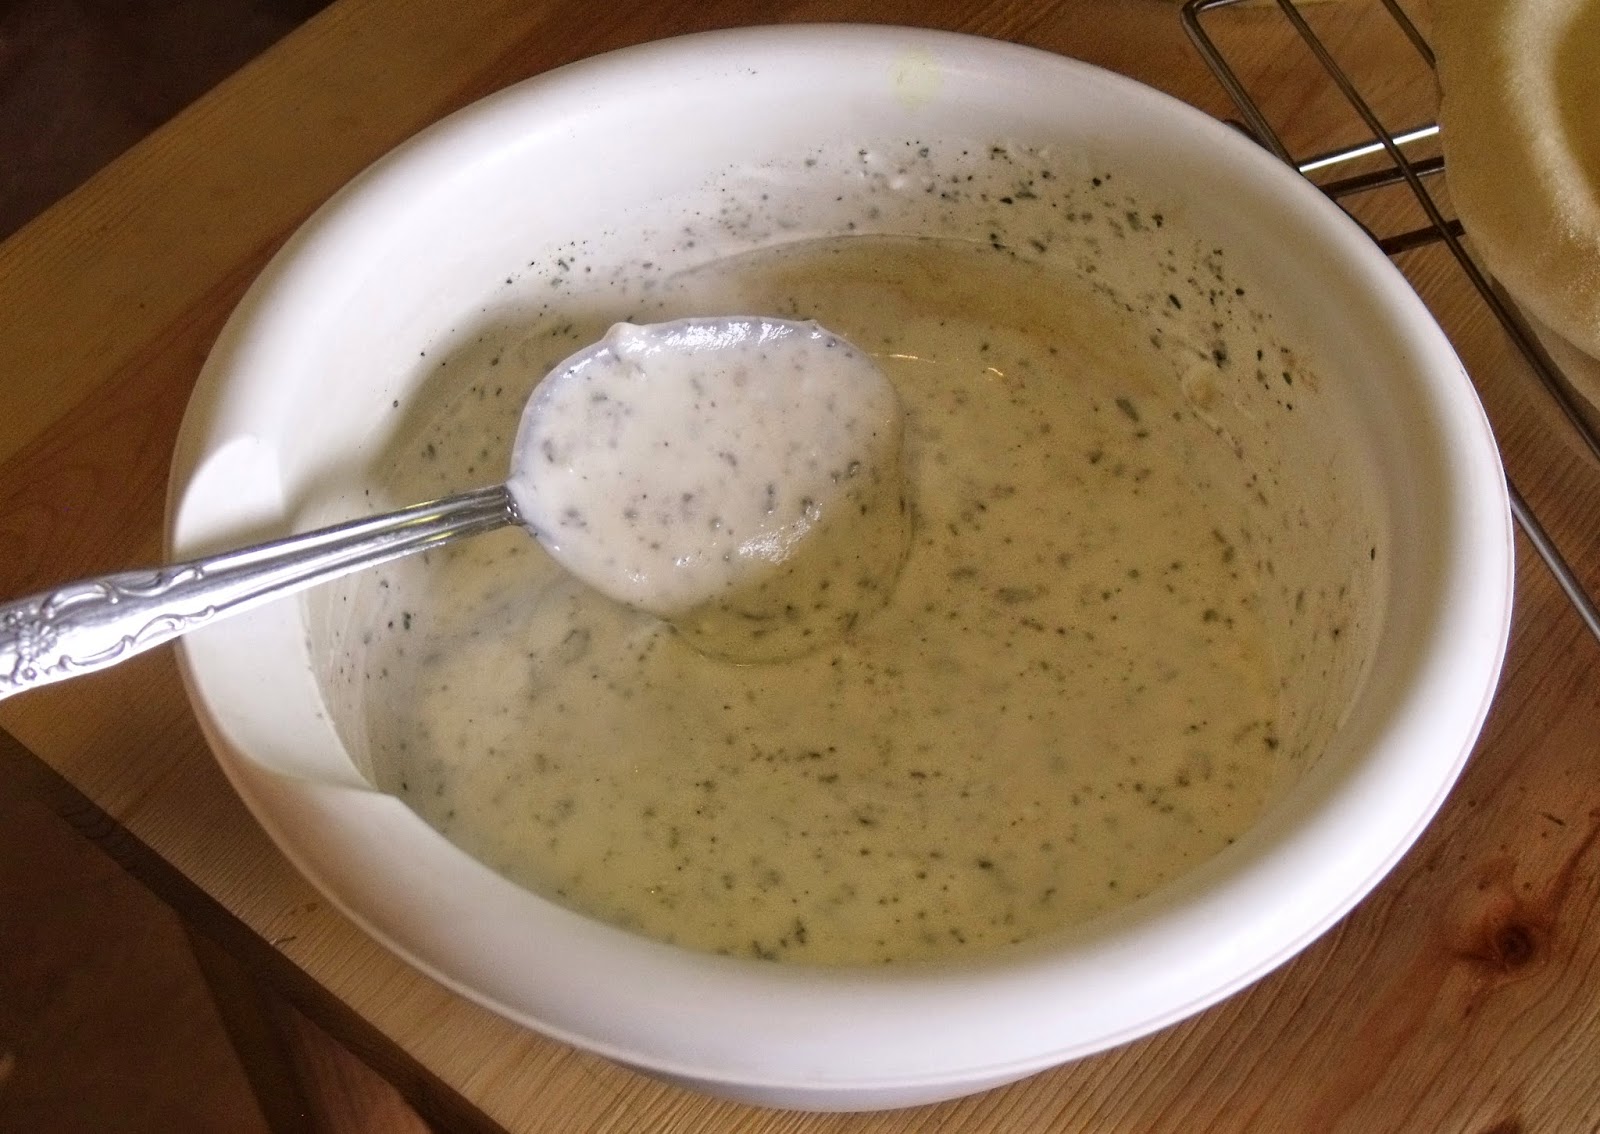
For the yogurt sauce, I remember that I used elements from various recipes to create it, but it was two months ago and I don't remember exactly how I made it! So this is sort of a guess about the general ingredients and quantities...

Yogurt Sauce
1 cup plain yogurt
1 tsp. onion powder
1 tsp. minced garlic
2 tsp. dried mint, crushed
1 tsp. dried oregano
Salt and pepper to taste

Combine in a small bowl. Chill for at least a couple of hours.


Serve falafel inside pita pockets with yogurt sauce, sliced tomatoes and cucumbers, and shredded lettuce. Enjoy!


Linking to Tatertots and Jello

Monday, May 26, 2014

My Kitchen My World - Saudi Arabia


I know that the last time I did a dish for My Kitchen My World I did chicken and rice, but I couldn't resist doing it again this month. It's interesting how so many different countries can do a similar dish, but do it so differently!

Saudi Arabian chicken and rice, called Kabsa, was different from other versions of chicken and rice I've done, thanks to the exotic blend of spices, and the delicious topping of fried nuts and raisins. The whole family very much enjoyed this culinary trip to Saudi Arabia.


Kabsa (Saudi Chicken and Rice)
(adapted from Saji's)
2 chicken breasts
6 cups water
1/2 cup chopped onion
2 bay leaves
1 tsp ground cinnamon
1 tsp salt
2 tbsp olive oil
6 tbsp butter, divided
1 1/2 cup chopped ripe tomato
2 cups chopped onion
2 cups long grain rice
salt to taste
1 tsp ground cardamom (at $10 a bottle, this is too expensive for me - I substituted an additional 1/4 tsp nutmeg, 1/2 tsp allspice, and 1/2 tsp ginger)
1 tsp ground coriander
10 cloves
1/2 tsp nutmeg
1/4 tsp cinnamon
1/4 tsp ground black pepper
1/2 cup raisins soaked in 1/3 cup water
1/2 cup sliced almonds
1/2 cup pistachios
1/2 cup pine nuts

In a large pot place chicken, water, onion, bay leaves, cinnamon, and 1 tsp salt and let cook covered on low heat for about 1 1/2 hour.

In another large pot add olive oil and 1 tbsp butter, then add chopped onions and chopped tomatoes and cook for 10 minutes on medium heat. Next add rice and seasonings. Mix and then add 4 cups of chicken broth from the cooked chicken. Stir and then add 3 tbsp butter. Let come to a boil and then turn down to low heat, cover and let cook for 45 minutes.

In a small pan, add 2 tbsp butter and stir in nuts and raisins, let cook until all are evenly brown, set aside for garnish. In the mean time, pull apart cooked chicken and remove any bones.

After 45 minutes, fluff rice with a fork and let sit another 10 minutes.

Pour out the rice into a large serving dish, place pieces of chicken on top and then put the nut and raisin mixture on top of that. Serve.


Linking to:
My Kitchen My World
Think Tank Thursday (Joyful Homemaking)

Monday, April 14, 2014

Cream Cheese Danish


Our kids officially started their spring break today, and we celebrated with this delicious pastry for breakfast. The recipe makes 2 loaves and we only ate one today, so we get to enjoy the other one for breakfast tomorrow. I like recipes like that!

This is a good recipe for a late breakfast. You mix up the dough the night before, then it rises in the fridge overnight and you roll it out, fill it, and bake it in the morning. The kids and I really enjoyed it, though one didn't care for the filling. The rest of us loved the whole thing. Because it takes so long to finish in the morning, it's definitely not an everyday breakfast, but worked really well for a special occasion and I want to make it again sometime.


Cream Cheese Danish
(adapted from Taste of Home)
2 1/4 tsp. active dry yeast
1/4 cup warm water
3 tbsp. sugar
2 eggs
1/2 cup sour cream (didn't have any on hand, I just used whole milk soured with some vinegar)
1/4 tsp. salt
3 cups all-purpose flour
Filling:
2 8-oz. packages cream cheese
1/2 cup sugar
2 egg yolks (I used whole eggs, why separate the eggs if you don't absolutely have to?)
2 tsp. vanilla
1/4 cup jam, jelly, or preserves (used grape jelly)
Powdered sugar

In a large bowl, dissolve yeast in water. Add the sugar, butter, eggs and sour cream. Gradually add salt and 2 cups flour; beat until smooth. Stir in remaining flour (the dough will be soft and sticky). Place in a greased bowl. Cover and refrigerate overnight.

Punch dough down. Turn onto a lightly floured surface; knead 2-3 times. Divide in half. Roll each half into a 16-in. x 10-in. oval; place on greased baking sheets.

For filling, in a large bowl, beat the cream cheese, sugar, egg yolks and vanilla until smooth. Spread 1-1/4 cups filling over each oval to within 1 in. of edges. Fold longest sides over filling to meet in the middle; pinch edges to seal. Cover and let rise in a warm place until doubled, about 1 hour.

 Bake at 375° for 20-22 minutes or until golden brown. Remove from pans to wire racks to cool. Spread jam on top. Dust with confectioners' sugar. Store in the refrigerator.


Tuesday, April 1, 2014

My Kitchen My World - Belize

Belize was the MKMW country for March. I know that I'm posting in April, but since we made and ate this meal yesterday, technically it still counts for March.

Belize is a small country in Central America, between Mexico, Guatemala, and the Caribbean Sea. The food is similar to both Mexican and Jamaican/Anglo-Caribbean cuisine.

One of the basic staples of Belizean cuisine is stewed chicken served with beans and rice. The recipe I found for the chicken does not use recado (a Mayan spice blend), and the beans and rice use coconut milk. This was a delicious meal. My favorite part was the sauce made from the pan drippings. The onions just melted into the chicken drippings, and it all came together to make a very flavorful gravy that I really enjoyed.


Belizean Stewed Chicken
(from Belize News Post)
4 lbs of chicken cut into pieces, drumsticks and thighs seem to work best, bone in (I used two leg quarters)
1 tsp salt, or to taste
1 tsp pepper, or to taste
1 1/2 tablespoons dried thyme
2 cloves garlic, finely chopped
2 tablespoons oil, or enough to just cover the bottom of the pot
1 small yellow or Spanish onion, chopped
2 tablespoons flour, mixed with 2 tablespoons water (I used extra water, it was too thick at first)

Mix salt, pepper, thyme, and garlic (garlic powder can be substituted) creating a rub. Season chicken with salt, pepper, thyme and garlic mixture.

Heat two tablespoons (or enough to fully cover the bottom of the pan) of oil in large dutch oven or stewing pot over moderately high heat.

Place the chicken in the pan starting skin down. Brown chicken, turning pieces once, about 5 minutes per side.

As chicken browns, add onions, cover pan and simmer on low heat for 10 to 15 minutes so chicken will stew. Recipes vary on the amount of time, many call for 1-2 hours of stewing. Make sure your chicken is fully cooked before enjoying! (Mine stewed for about half an hour before the chicken was done).

After the chicken has finished cooking add a few teaspoons of water to skillet and the flour to thicken the gravy.


Belizean Beans and Rice
(adapted from Belize News Post)
1 large can beans (I used a combination of several types, including black, navy, and pinto)
1/2 tsp pepper
1/2 tsp thyme
1 tsp salt
2 cloves garlic, chopped
1 medium onion, sliced
1 cup coconut milk
2 lbs. rice (I only used 1 1/2 cups, whatever that ends up weighing)

Season beans with black pepper, thyme, and salt. Add coconut milk and 3 cups water. Stir and taste. Let boil.

Add rice to seasoned beans. Stir, then cover. Cook until water is absorbed or rice is tender. If necessary, add more water gradually until rice is tender.

Friday, March 14, 2014

Layered Pumpkin Chiffon Pie

In honor of Pi Day (March 14 = 3/14 = 3.14), Jeff and I decided it would be criminal not to make some sort of pie. I know that pumpkin is more of an autumn thing, but it's what we had on hand and the recipe just looked so delicious.

This recipe came from an old (1978) Better Homes and Gardens recipe book, called "All-Time Favorite Pies." I love old recipe books, they're so much fun! Anyway, this layered chiffon pie has a mild pumpkin flavor that Jeff and I agreed would be wonderful as a Thanksgiving dessert. But being so light and fluffy, it wasn't at all too heavy for early spring. Just an all-around delightful pie.


Layered Pumpkin Chiffon Pie
Oil Pastry Crust
1 cup plus 2 tbsp. all-purpose flour
1/2 tsp. salt
1/4 cup oil
3 tbsp. cold milk
Chiffon Filling
1/2 cup sugar
1 envelope unflavored gelatin
1/2 tsp. salt
1/2 tsp. ground cinnamon
1/2 tsp. ground allspice
1/4 tsp. ground ginger
1/4 tsp. ground nutmeg
3 slightly beaten egg yolks
1 cup pumpkin puree, canned or cooked from fresh
1/2 cup milk
3 egg whites
1/4 cup sugar
Whipped Cream Filling
1 cup whipping cream
1/4 cup sifted powdered sugar
1/2 tsp. vanilla
1/4 tsp. ground cinnamon

Prepare crust: Stir together flour and salt. Pour oil and milk into small bowl (do not stir); add all at once to flour mixture. Stir lightly with a fork. Form into a ball; flatten slightly with hands.

Cut waxed paper into two 12-inch squares. Place ball of dough between 2 squares of paper. Roll dough into circle to edges of paper (Dampen tabletop with a little water to prevent paper from slipping). Peel off top paper and fit dough, paper side up, into pie plate. Remove paper.

Prick bottom and sides of pastry all over with a fork, to prevent the crust from puffin up. Line pastry shell with a double thickness of heady-duty foil; press down firmly but carefully. Bake pastry in preheated 450 degree oven for 5 minutes. Remove foil, continue baking 5 to 7 minutes more or until pastry is golden. Set pastry aside.

Prepare chiffon filling: In a saucepan combine the 1/3 cup sugar, gelatin, salt, the 1/2 tsp. cinnamon, allspice, ginger, and nutmeg. Combine egg yolks, pumpkin, and milk; stir into gelatin mixture in saucepan. Cook and stir over medium heat till gelatin dissolves and mixture thickens slightly. Remove from heat. Chill gelatin mixture to the consistency of corn syrup, stirring occasionally. (That's what the recipe says. But with the pumpkin, the consistency was never anywhere near corn syrup, it was too thick and gloppy. I just chilled it until it was noticeably thickened.)

Immediately beat egg whites till soft peaks form. Gradually add the 1/4 cup sugar, beating till stiff peaks form. Fold stiff-beaten egg whites into gelatin mixture. Set aside.

Prepare whipped cream filling: Combine whipping cream, powdered sugar, vanilla, and the 1/4 tsp. ground cinnamon. Whip mixture till soft peaks form.

Spread half of chiffon filling into baked crust, top with half of whipped cream filling. Repeat layers; chill several hours or overnight until set. After serving, cover and chill to store.


I know there's a lot of steps. But the finished product is so worth it. As a side note, I really liked this method of pie crust. No shortening to cut in, no floury mess on the table to roll it out. It turned out light and crispy, a great accompaniment to the airy fluffiness of the filling. Mmm, so yummy!

P.S. Here is the book where I got the recipe. Isn't it delightful?

Saturday, February 22, 2014

My Kitchen My World - Czech Republic

Our MKMW destination for February was the Czech Republic. I found a few recipes that intrigued me, but finally decided on these lovely deli sandwiches called Obložené Chlebíčky. I have no idea how that is actually pronounced! But basically these are open-faced sandwiches with flavorful and artfully-arranged toppings. So pretty, and so yummy.


My daughter recently asked if we could do a "sandwich meal" - different kinds of breads and spreads and sandwich fillings, and everyone makes their own special sandwiches just the way they want them. I thought that was a great idea, and the perfect time to do the Czech sandwiches.

We set this all up using some ingredients typical of the Czech deli sandwiches, and some typical of regular old American sandwiches, so everyone would have a good variety to choose from.

So here is my kitchen island, covered in the breads and some spreads and toppings:


Homemade french bread, hoagie rolls, and flat bread, all made using my favorite universal bread formula; mayo, mustard, oil and vinegar, sriracha, and relish

And here is the counter with all the meats, cheeses, veggies, and a couple other spreads:

Ham, turkey, salami, and pepperoni; provolone, swiss, muenster, and colby jack; tomatoes, red pepper, pickles, eggs, lettuce, and cucumber; potato salad and guacamole

 I was really the only one to make Obložené Chlebíčky sandwiches. But wow, I'm glad I did!


So beautiful! I do, however, admit to having to use toothpicks to keep my salami rolled like that...

The first sandwich is a slice of french bread spread with potato salad, and topped with hard salami, provolone cheese, sweet pickle, a slice of tomato, and a slice of boiled egg.

The second sandwich also started with french bread and potato salad, then was topped with ham, muenster cheese, sweet red pepper, a slice of boiled egg, and a dash of paprika.


Honestly, I have never before thought to put potato salad on a sandwich. It never even crossed my mind. But it was so delicious on these sandwiches! Also, I don't really even care for sweet pickles. But again, together with the other sandwich toppings, they somehow worked.

It would have been fun to experiment with some of the more fun and unique toppings typical of the
Obložené Chlebíčky, but our budget doesn't quite cover stuff like lobster spread, anchovy paste, caviar, capers, or camembert. Maybe someday. :)